When you start out learning to drive, it can be difficult to perceive where your car is on the road at any given time. Issues with spatial awareness are common, but get easier as you gain driving experience.
Driving instructors often use reference points for learners. Reference points are particularly useful for manoeuvres (such as parallel parking), but can also be a useful aid for understanding your car’s road position, for example at junctions. If you are struggling to know where to stop at T-junctions, you may find these reference points useful.
Where to Stop at a T-Junction When Turning Right
When you stop at a T-junction, it’s important that you stop in the right place. Too far back means you may not gain the optimal observational position for the major road you intend on joining. Too far forward means the front of your car may protrude dangerously, over the junction lines and into the major road.
The more you practice at T-junctions, the easier it gets up until the point you’ll no longer need reference points. But in the meantime, if you’re not sure where to stop at a T-junction when turning right, use these reference points.

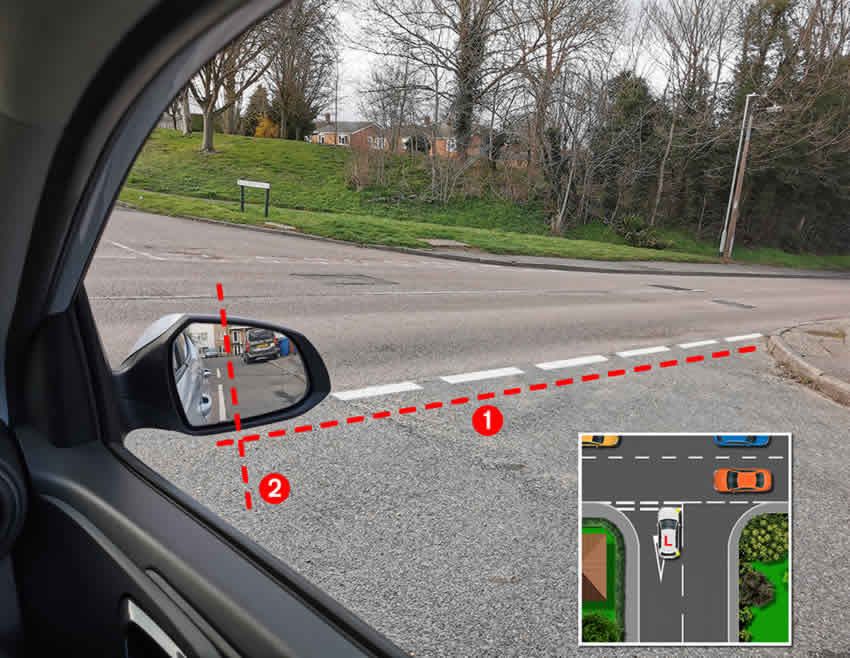
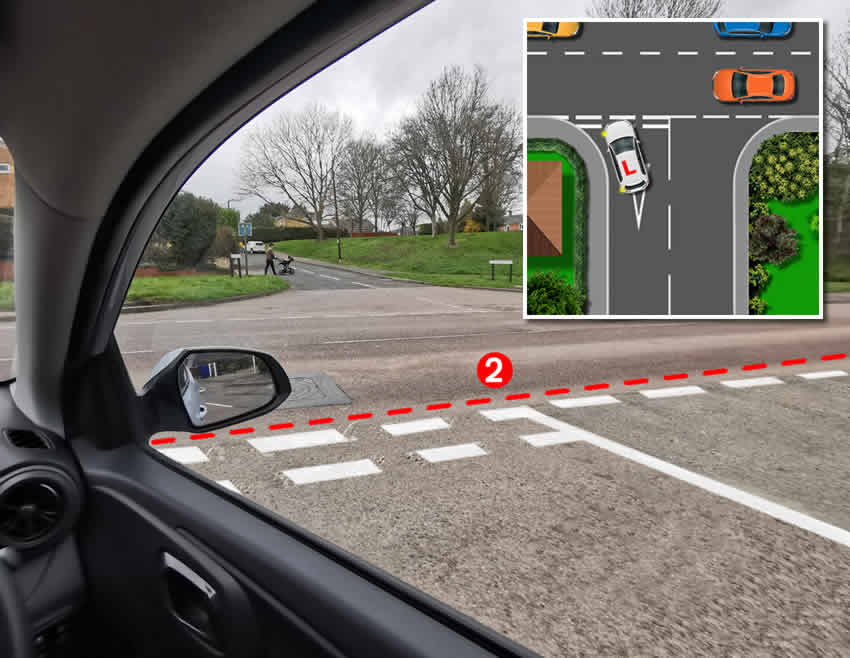
As we can see from this marked T-junction, once the car has stopped at an ideal position for turning right, the junction road markings (1) line up perfectly with the right door mirror. We can also use road markings (2) to see that we are parallel and just to left of the centre line.
This is an ideal position for stopping at a T-junction when making a right turn. You can use these reference points up until you become proficient and have no further use of them. Exact reference points may vary slightly depending on your vehicle.
Where to Stop at a T-Junction When Turning Left
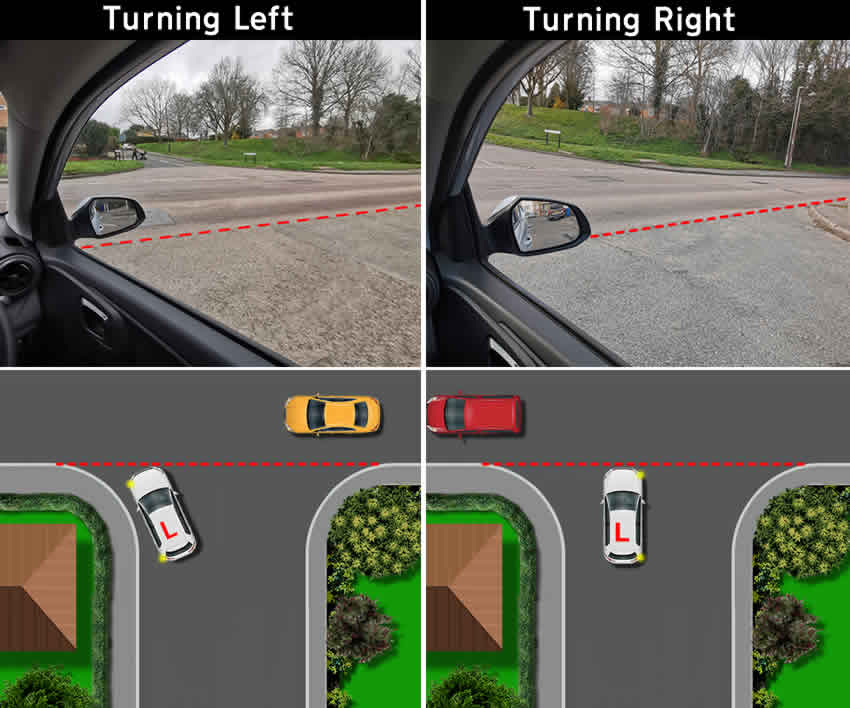
When turning left at a T-junction, due to your car stopping at an angle, the reference points will look slightly different. When turning left at a T-junction, you need to maintain a good road position. To do this, follow the kerbline round to the left.

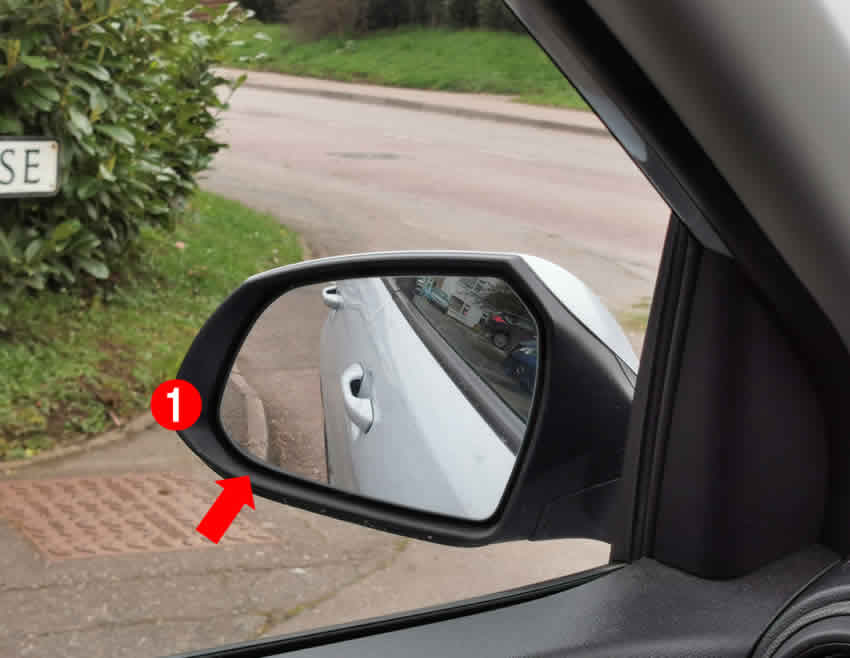
In the left door mirror, we can see the curve of the kerb, a small amount of road and then the side of the car (1). Sitting up in your seat will provide the best view of the kerb. Follow the kerbline round to the left until you reach reference point 2.

For reference point 2, due to the angle of the car following the kerbline to the left, the reference point is lightly different compared to turning right at a T-junction. Reference points aren’t an exact science, they’re just a guide to help you understand where your car is on the road.
How to Establish Reference Points
To establish the reference points, ask your driving instructor / supervising passenger to help you stop the car in a perfect position for turning right at a T-junction. Then, sit in your normal driving position and work out your own reference points. They may slightly vary to those above. Make sure it’s a quiet junction so that it gives you time to memorise the reference points.
Once you’ve established the reference points, approach junctions very slowly, giving you time to not only look for the stopping reference points, but to also to look around. As you going more experience, you have less need for the reference points.
Unmarked T-junctions
The above reference points are ideally suited to marked junctions that have road markings. You can also use the same reference points at unmarked junctions (junctions that do not have road markings.)
It can be a little more challenging at unmarked junctions due to the lack of road markings. As you approach an unmarked T-junction, you’ll need to predict where you think the give way road marking would be if there were one.

A line from the furthest kerb stones will form the location of the line. You’ll then need to anticipate where this line will form the reference point for stopping at the junction. As you gain experience with marked junction, move onto unmarked junctions to gain experience on these.