Many parents are making the choice to teach their own children how to drive. While there can be financial advantages to this, it’s important that you get things right, because if taught incorrectly, it’ll end with a string of failed driving test attempts and eventually, you’ll need to pay an instructor to put right all that was incorrectly taught.
Choosing an Appropriate Location
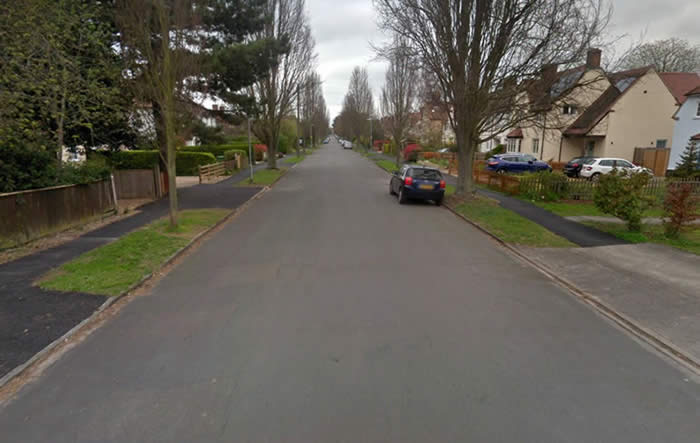
An ideal location for teaching moving off and stopping is a quiet urban street. Avoid anywhere that’s too busy as there’ll be too much going on for a novice driver to cope. Also avoid country lanes as they can be dangerous. A street similar to this would be ideal:

An appropriate location for practicing the moving off and stopping procedure will include:
- A quiet road: The novice driver needs to concentrate on moving off and stopping, not with lots of passing traffic.
- A wide road: This makes it easier for any passing vehicles to get through and is convenient for both learner and other road users.
- A straight road: The novice driver doesn’t want to be dealing with navigating lots of bends on their first lesson.
- Not too many parked cars: Passing parked cars is a lesson in itself and not something you want too much of on the first lesson.
- A defined kerbline: A kerbline that is easy to see will help with reference points when stopping on the left.
- Areas with no parking restrictions: At this early stage, the learner needs to concentrate with the task at hand and not be concerned with the legality of parking.
It’s not always easy to find the perfect road to start driving lessons, but if you can find a street that has most of what’s described above, then you’re good to go.
Use Reference Points
When pulling up next to the kerb, we need to stop parallel and within 30 cm from from it. Now, telling a learner driver to park within 30 cm from the kerb is a little pointless as they’ll have no idea how to judge the distance from the kerb and the car. Most learner drivers lack spatial awareness when they start out and it takes time and practice to get it right.
This is where reference points become important. Reference points are by no means highly accurate, but they provide a visual aid on what the learner needs to achieve.
First Things First
Once you’ve arrived at the location for teaching moving off and stopping, you’ll need to swap seats. ensure the engine is off, select Park (P) and ensure the parking brake is applied. As you’re getting out to swap seat, show the learner driver the distance that you have parked from the kerb and that the car is parallel to it.
Before the learner attempts to drive the car, it’s important to first start with the cockpit drill because the learner driver must understand how to adjust the seat and steering, plus learn the basics of vehicle controls and mirrors. See:
Once you’ve run through this, it’s time to set up those reference points. You can use a small sticker on the dashboard to line up with the kerb and also use the left mirror to take a mental ‘snapshot’ of what it looks like to be parked in a good position. For help with this, see how to park next to the kerb without hitting it.
Time to Drive the Car
It’s now time to start the car and practice moving off and stopping. Examiners are strict when it comes to moving off and stopping. Observations, timing, progress and appropriate use of signals are essential. To practice moving off and stopping, read the detailed tutorials:
Have any questions? Let us know in the comments below.